Setup Raspberry Pi for flashing with flashrom Tutorial
In this tutorial, we will go through the steps to setup a Raspberry Pi for flashing with flashrom.
Prerequisites
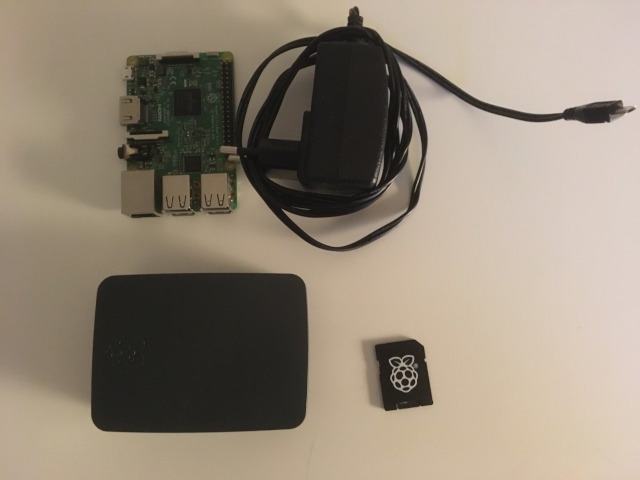
Things you need:
- Raspberry Pi
- Official 5.1V 2.5A Power Supply for Raspberry Pi.
- 16 GB (or more) class 10 MicroSD card for Raspberry Pi OS.
- HDMI cable
- Keyboard and Mouse
This tutorial assumes you're using a GNU/Linux distro for the commands outside of the Raspberry Pi and are familiar with how to use a terminal.
I'm using a Raspberry Pi 3 Model B for this tutorial but any model supported by Raspberry Pi OS will work fine.
Install and setup Raspberry Pi OS
Download Raspberry Pi OS (with Desktop is recommended) from here
Unzip Raspberry Pi OS image:
unzip IMAGE_NAME.zipInsert the MicroSD card in a reader and check name of MicroSD card:
sudo fdisk -lFlash the unpacked Raspberry Pi OS image to the MicroSD card:
sudo dd if=IMAGE_NAME.img of=/dev/YOURSDCARD bs=2M status=progress oflag=syncConnect the peripherals (keyboard, mouse, HDMI, power cable), insert the MicroSD card and boot the Raspberry Pi and make sure it works.
Make sure all software is updated:
sudo apt-get update
sudo apt-get dist-upgrade
sudo reboot
Check the IP address of your Raspberry Pi:
ip addrWrite down the IP address (if using WiFi see 'inet' under 'wlan0'). It should look something like 192.168.1.11. You'll need this IP address later to be able to connect using SSH from another computer.
Next you need to change some things in the config:
sudo raspi-configIn this menu, select '3. Interface Options' and enable the following options:
SSH
SPI
I2C
Reboot the Raspberry Pi once this is done.
Try connecting to the Raspberry Pi from another computer using SSH:
ssh pi@192.168.1.11Change '192.168.1.11' to the IP address you wrote down in earlier step. When it asks for a password, enter the password for the user 'pi'.
From here on you can disconnect all peripherals and do the rest using SSH.
Compile flashrom
Clone flashrom git repository:
git clone https://review.coreboot.org/flashrom.gitCompile flashrom:
cd flashrom
sudo make install CONFIG_ENABLE_LIBUSB0_PROGRAMMERS=no CONFIG_ENABLE_LIBUSB1_PROGRAMMERS=no CONFIG_ENABLE_LIBPCI_PROGRAMMERS=no
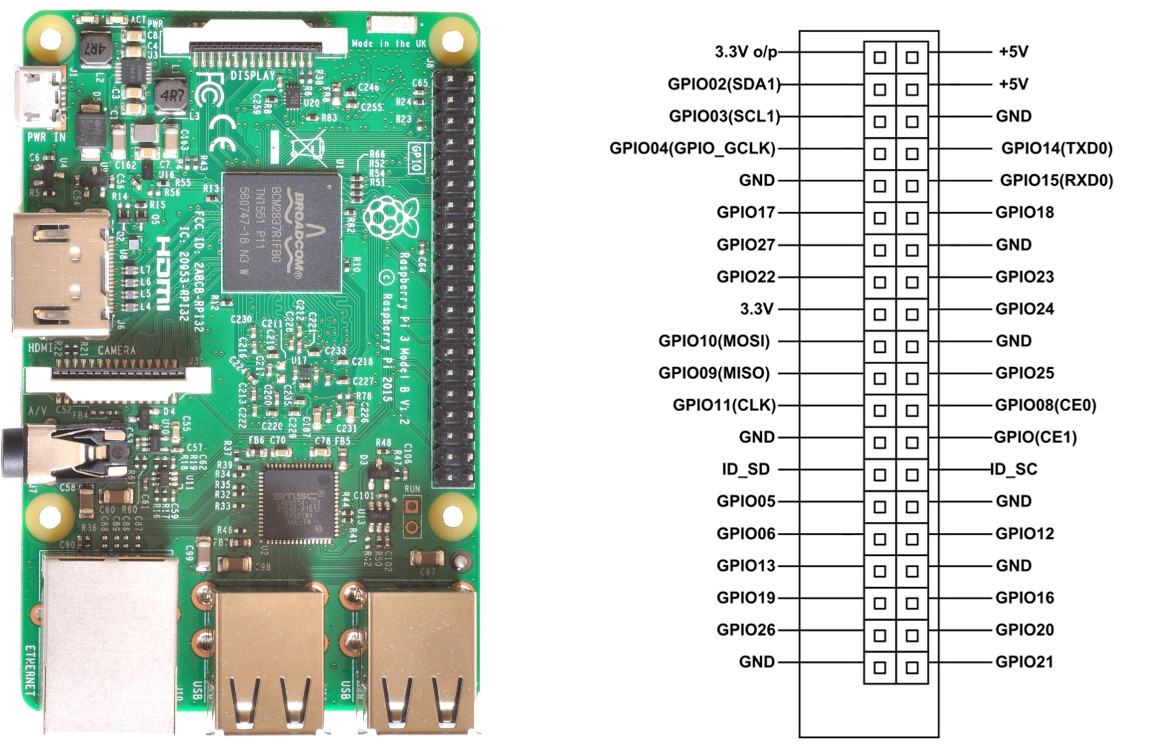
sudo cp /usr/local/sbin/flashrom /usr/local/bin/Raspberry Pi GPIO pinout
Raspberry Pi 3 Model B GPIO pinout below. Raspberry Pi 4 seems to have the same layout and other models too probably. See GPIO pinout diagram for your specific Raspberry Pi to be sure.
Note: In flashing tutorials CS = GPIO08(CE0) (/dev/spidev0.0)
Example usage
Read from connected chip:
sudo flashrom -p linux_spi:dev=/dev/spidev0.0,spispeed=32768 -r factory_bios_01.rom -VRead from specified chip:
sudo flashrom -p linux_spi:dev=/dev/spidev0.0,spispeed=32768 -r factory-bios-top-1.bin -c "MX25L3206E/MX25L3208E" -VWrite to connected chip:
sudo flashrom -p linux_spi:dev=/dev/spidev0.0,spispeed=32768 -w coreboot.rom -VWrite to specified chip:
sudo flashrom -p linux_spi:dev=/dev/spidev0.0,spispeed=32768 -w coreboot.rom -c "MX25L3206E/MX25L3208E" -VCongratulations! We're done. Now you can start flashing coreboot rom's.
Recommended reading
https://www.raspberrypi.com/
https://www.coreboot.org/
https://www.flashrom.org/
Unless otherwise stated, blog posts on this site are copyrighted by their respective authors and published under the terms of the CC-BY-SA 4.0 license.